How To Install KeePass On Ubuntu And Use It To Manage Passwords
KeePass is an awesome password manager. It is the only password manager which is completely free compare to other password manager alternatives. Before we dig deeper in to KeePass installation and its usage. Let us look at some of the KeePass features.
KeePass Features and Benefits
- Completely Free and Open Source
- Ton of plugins available
- Give full control of your data
- Supports almost all the platforms - Windows, Mac, Linux; unofficial Android, iOS and Chrome OS ports
- Browser plugins: Third-party extensions for Chrome, Firefox, Internet Explorer, Opera, Safari
It can be easily installed on Centos, Ubutnu, Mac and Windows. In this post, we will go through the steps of installing KeePass on Ubuntu.
KeePass has two versions which can be installed on Ubuntu.
- KeePass2 (Recommended)
- KeePasxc (a fork of KeePass)
In this post, I would go through the steps of installation for both the KeePass versions. But if you are installing it on Ubuntu, install KeePass2, it has lot more features which comes right out of the box with the installation.
Install KeePass2 On Ubuntu
Let us first update the system packages.
Update Apt-get packages
apt-get update
Install KeyPass now
apt-get install keepass2 -y
Run following command to check the version
keepass2 --version
KeePass 2.44
Let us start KeePass now...
keepass2 &
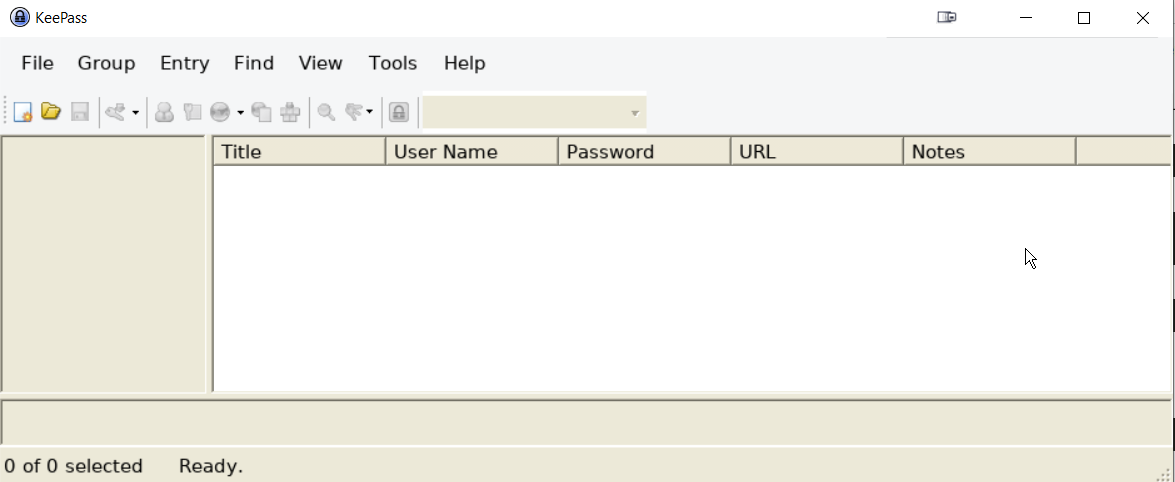
You should see following empty screen if you are invoking the KeePass for the very first time.
How To Use KeePass2
Let us create a password database first. Go to File > New
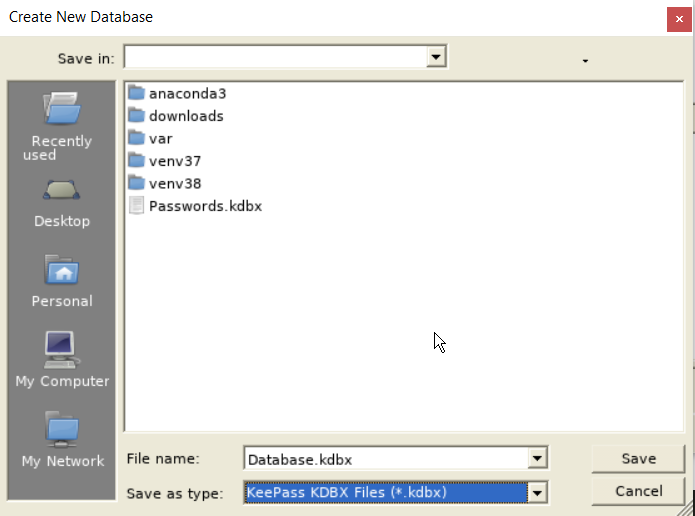
Now give a name to your database and choose the directory where you want to save your database, then click "save"
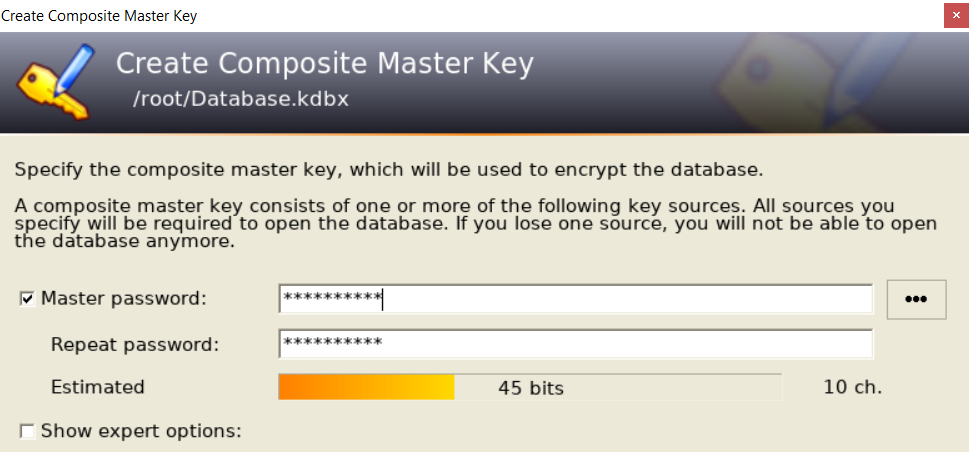
Once you click the "save", you will be prompted with the following screen. Add your "Master password". This password should be strict and unique. This is your master password to the database which would contain all of your other passwords. Fill in the password and click "ok" after that.
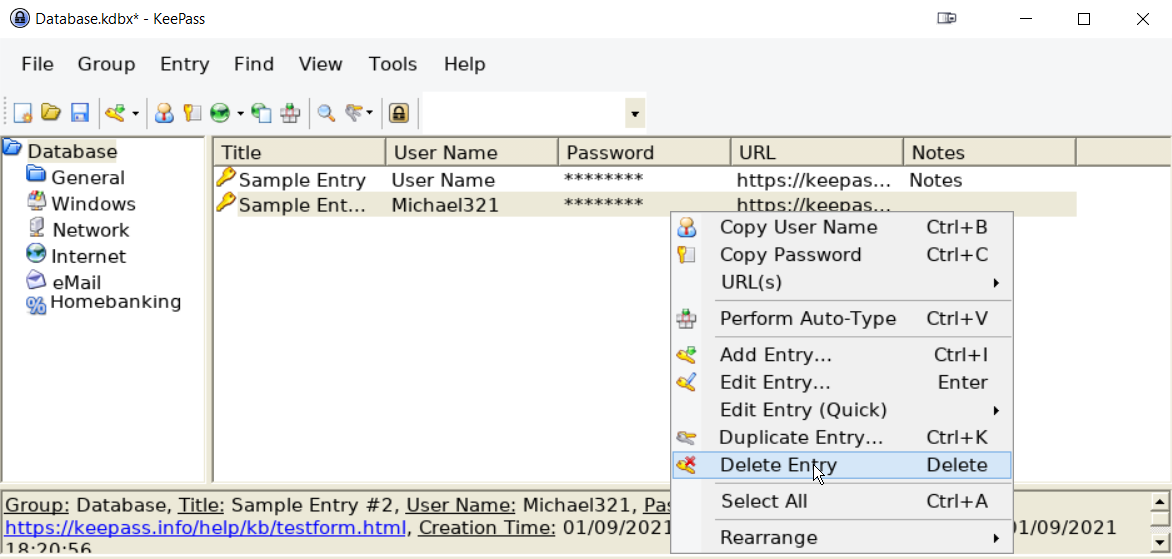
Skip the next screen (feel free to check advanced options, if interested) by pressing ok, you would see following GUI after that. Delete both the sample passwords by right clicking on top of each row and then choosing the "Delete Entry" option as shown below.
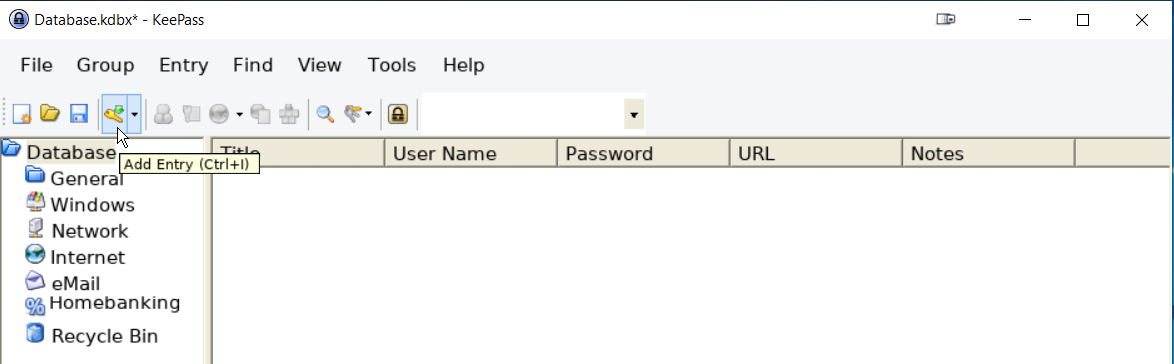
Now to create a new password entry, either Go to Entry > Add Entry option from the drop down menu bar or Click the yellow wrench as shown in the screen below.
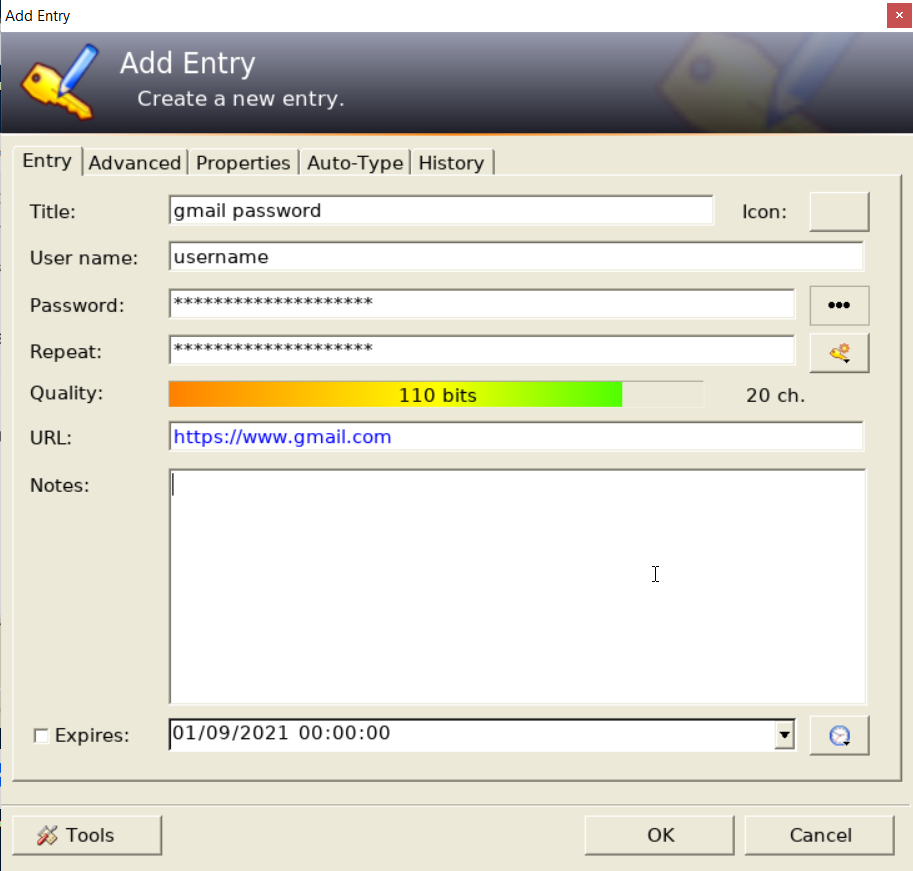
On the next screen, Fill in the details of the password which you want to store as shown below. The quality bar shows the characteristic of your password. You can click on the "yellow wrench" right next to "Repeat:" box to choose different options to generate a password of your choice.
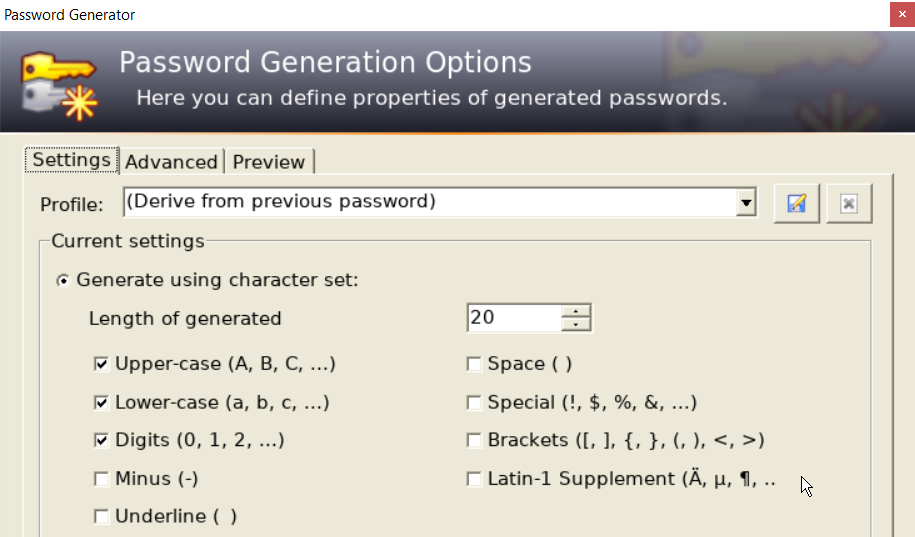
Password generator window is shown below...
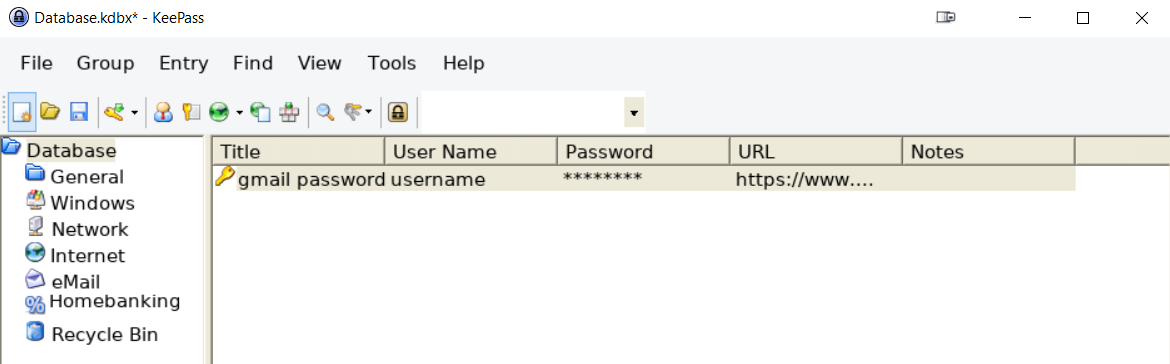
Ok once you are done setting up your password, you would see a new entry added to your main KeyPass window. Double click on the title which would open the details of the password that you just added.
Importing and Exporting Passwords Using CSV in KeePass
There are many features in KeyPass and it is impossible to cover all of them here. But importing and exporting passwords using CSV feature is worth mentioning.
Import passwords using CSV
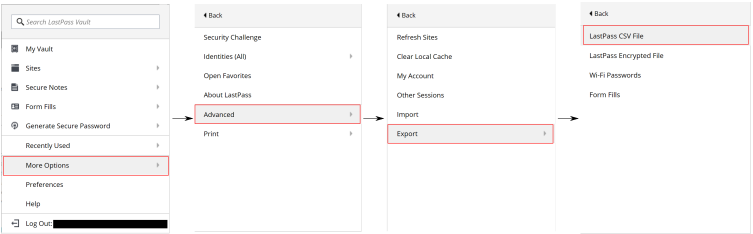
Keypass supports importing from many 3rd software. Let us say we want to transfer passwords from chrome extension LastPass to KeyPass. Go to, LastPass > More Options > Advanced > Export > LastPass CSV File, as shown below.
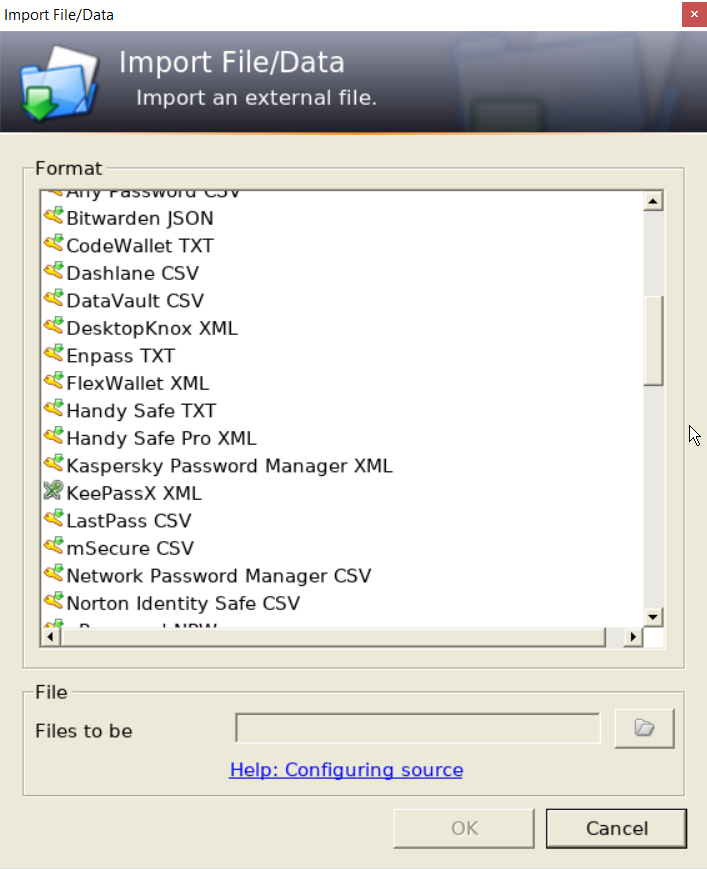
Now go to KeyPass and Click on Database > Import. You will see list of 3rd part software from which you can import. Scroll down the list and choose "Last Pass" and click "ok" after that. You would see all your "LastPass" passwords in KeePass now.
Export Passwords To CSV File
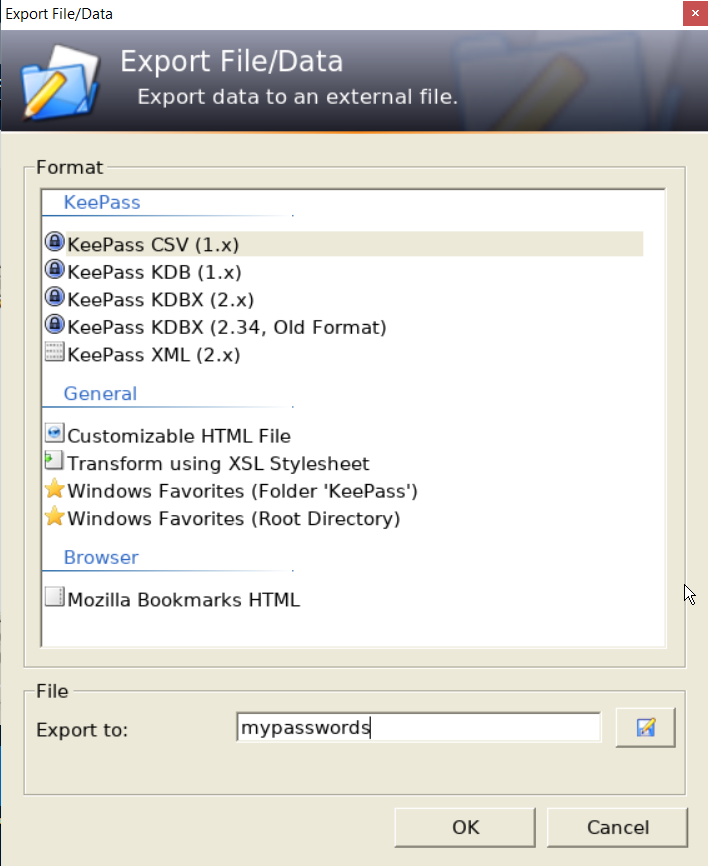
In KeePass, Go to File > Export. You would see below window. Choose first option "KeePass CSV (1.x)" and enter the new name for your csv file. Then click ok. KeePass will generate a CSV file which will have all the passwords contained in the Keepass database.
How To Install KeePassxc
We need to install snapd which is a package manager.
apt install snapd
Ok let us install KeePassxc now.
snap install keepassxc
Run following command to see if Keepassxc is installed successfully.
keepassxc --version
Following is required if you see the below error after the above command...
keepassxc: error while loading shared libraries: libQt5Core.so.5: cannot open shared object file: No such file or directory
Run following command...
strip --remove-section=.note.ABI-tag /usr/lib/x86_64-linux-gnu/libQt5Core.so.5
How To Use KeePassxc
Type keepassxc and a GUI should pop up...
keepassxc &
You can follow the KeePass2 instructions to navigate Keepassxc since most of the functionality is same. Therefore I will not go in detail of how to use Keepassxc.